In several instances Timbeter users face conditions that are not ideal for measuring yet still timber needs to be measured. One instance occurs in mountainous areas where the stacked piles maybe on a slope.
In several instances Timbeter users face conditions that are not ideal for measuring yet still timber needs to be measured. One instance occurs in mountainous areas where the stacked piles maybe on a slope. It can be very difficult to use Timbeter the way users are accustomed to, when the pictures need to be taken at a 90 degree angle. For these situations Timbeter have developed a possibility to calibrate the device according to the conditions you are facing. Meaning that in case you need to measure a pile that is for example at a 30 degree angle, you can calibrate the device accordingly to reflect the conditions you are facing. The easiest way to do that is to simply set the calibration according to the pile.

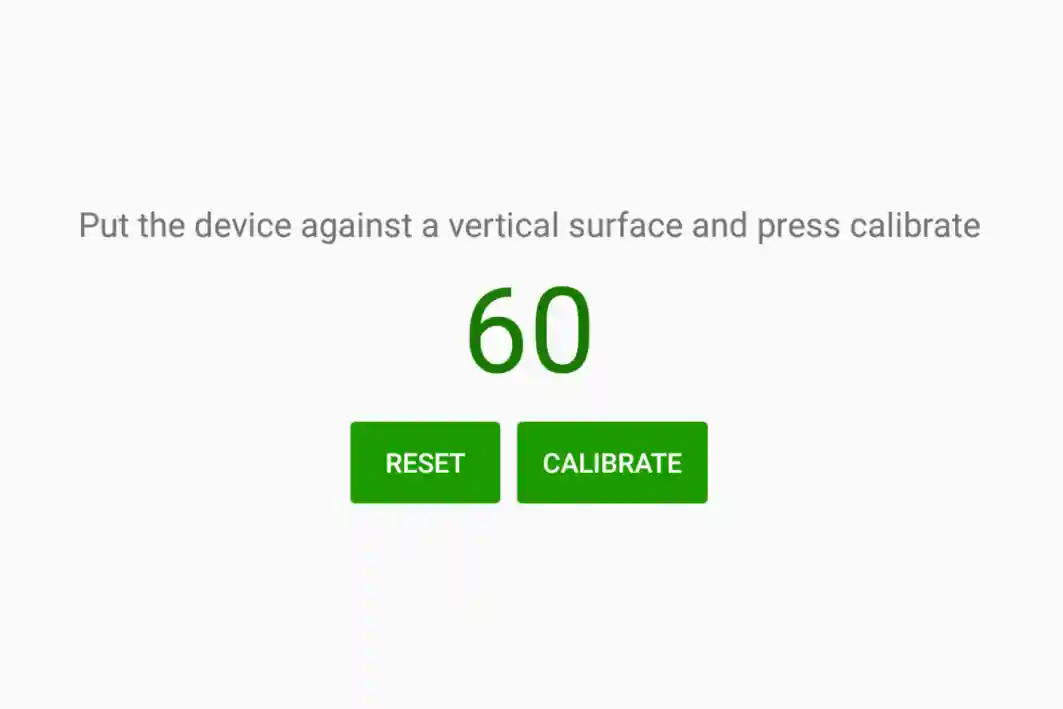
How does the slope calibration work?
Android phone cameras come with an in-built ability to compensate for objects being at a different distance from the phone if the objects are placed on a plane surface and at a right angle towards the camera. Each time you take an image of a stack of wood, the log ends will not be at the same distance to you. However, they still appear as having the same relative size in the image, which would not be possible without the camera phone adjusting to the relevant taken image.
The same can be applied if a wood pile is at an angle, provided the angle of the camera (α) is correct.
To ensure the correct angle, Timbeter provides a function to calibrate your smartphone camera. When the Android device held against the stack, it will be at the correct angle (provided that the log is straight, the log end is cut at a right angle and the back of the device is flat). This angle can be saved through calibration and the app will ensure that the following images are taken at this angle.

The height of the user (and subsequently held camera) has no impact to the picture taken as long as the angle is correct and the whole pile fits within the image. The Android phone camera’s design settings ensures minimal impact when taking these types of pictures.
To see for yourself that there is no distortion even at the edges of the image, try taking a picture of a checkered notebook page. The fact that the lines stay straight is due to the Android camera’s calibration. (Make sure the camera is straight when capturing this image!)